Ephys/Imaging Automation Pipeline
Data Folders
The ephys and imaging pipelines use the following data folder structures:
- Raw Data Directory Imaging: braininit/Data/Raw/imaging/(user)/(subject)/(session_date)_g(session#)/(user_defined_dir)
- Processed Data Directory Imaging: braininit/Data/Processed/imaging/(user)/(subject)/(session_date)g(session#)/(user_defined_dir)/job_id(jobid)/suite2p_output/suite2p
- Raw Data Directory Ephys: braininit/Data/Raw/electrophysiology/(user)/(subject)/(session_date)_g(session#)/(g#_spikeglx_dir)/(imec#_spikeglx_dir)
- Processed Data Directory Ephys: braininit/Data/Processed/electrophysiology/(user)/(subject)/(session_date)_g(session#)/(g#_spikeglx_dir)/(imec#spikeglx_dir)/job_id(jobid)/(sorter)_output
Initial configuration
Note: These steps are only needed if a red label reading "Configuration needed" appears in the top-right corner of the GUI.
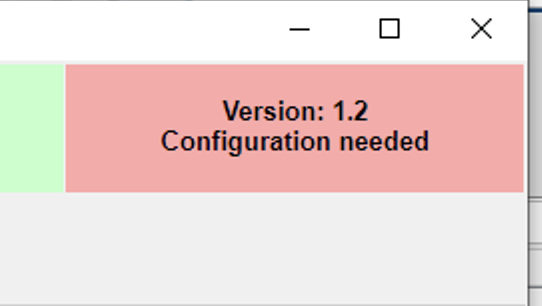
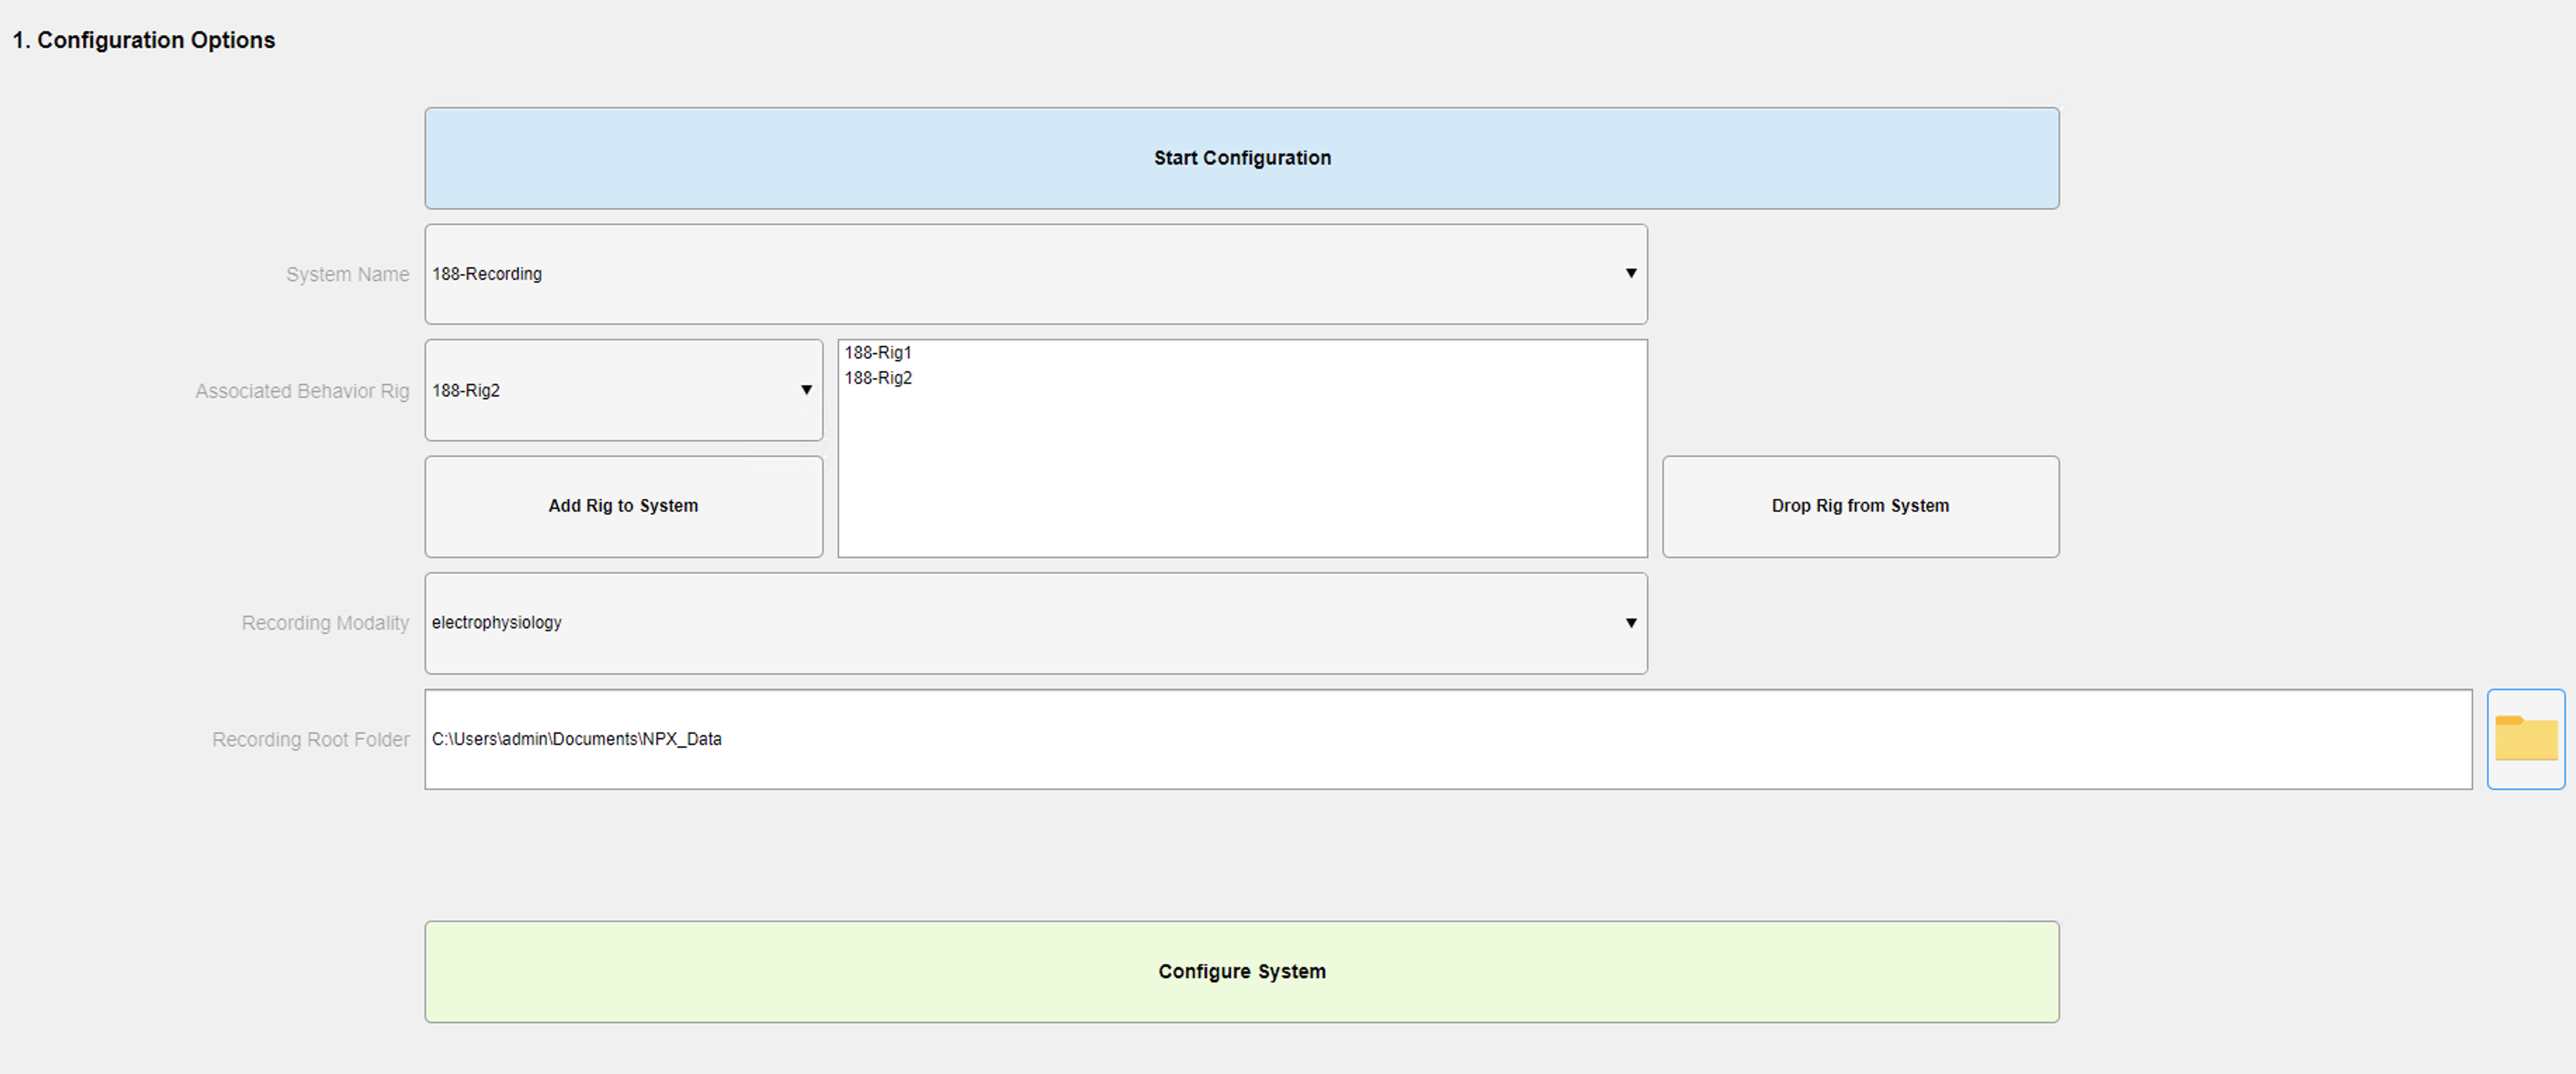
- Switch to the "System Configuration" tab.
- Click the "Start Configuration" button.
- In the "System Name" dropdown, select the corresponding system (normally named room#-Recording#).
- In the "Associated Behavior Rig" dropdown, select the corresponding rig paired with the recording system.
- Click the "Add Rig to System" button.
- Repeat steps 4 and 5 until all rigs associated with the recording system are added.
- In the "Recording Modality" dropdown, select the corresponding modality of the recording system.
- In the "Recording Root Folder" area, click the folder button to search for the parent path where all recordings will be stored.
- Click the "Configure System" button.
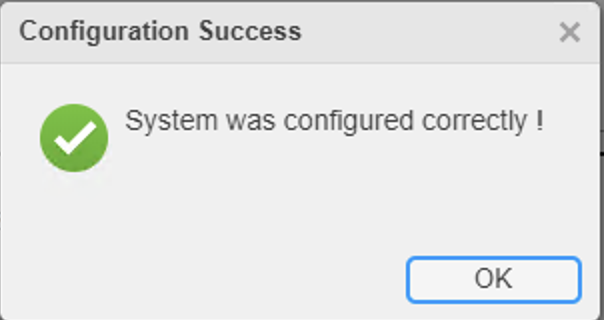
If something was configured incorrectly, you can repeat the entire process.
Automation GUI "regular use" Manual
- The automation GUI is located on the desktop of every microscope/ephys recording system across BRAIN CoGS. You can identify it by the BRAIN CoGS desktop icon called "Recording_Automation_GUI".
- We encourage you to register and process every recording with the Automation GUI as soon as the recording ends.
Default use case
- Open the GUI as soon as the recording ends.
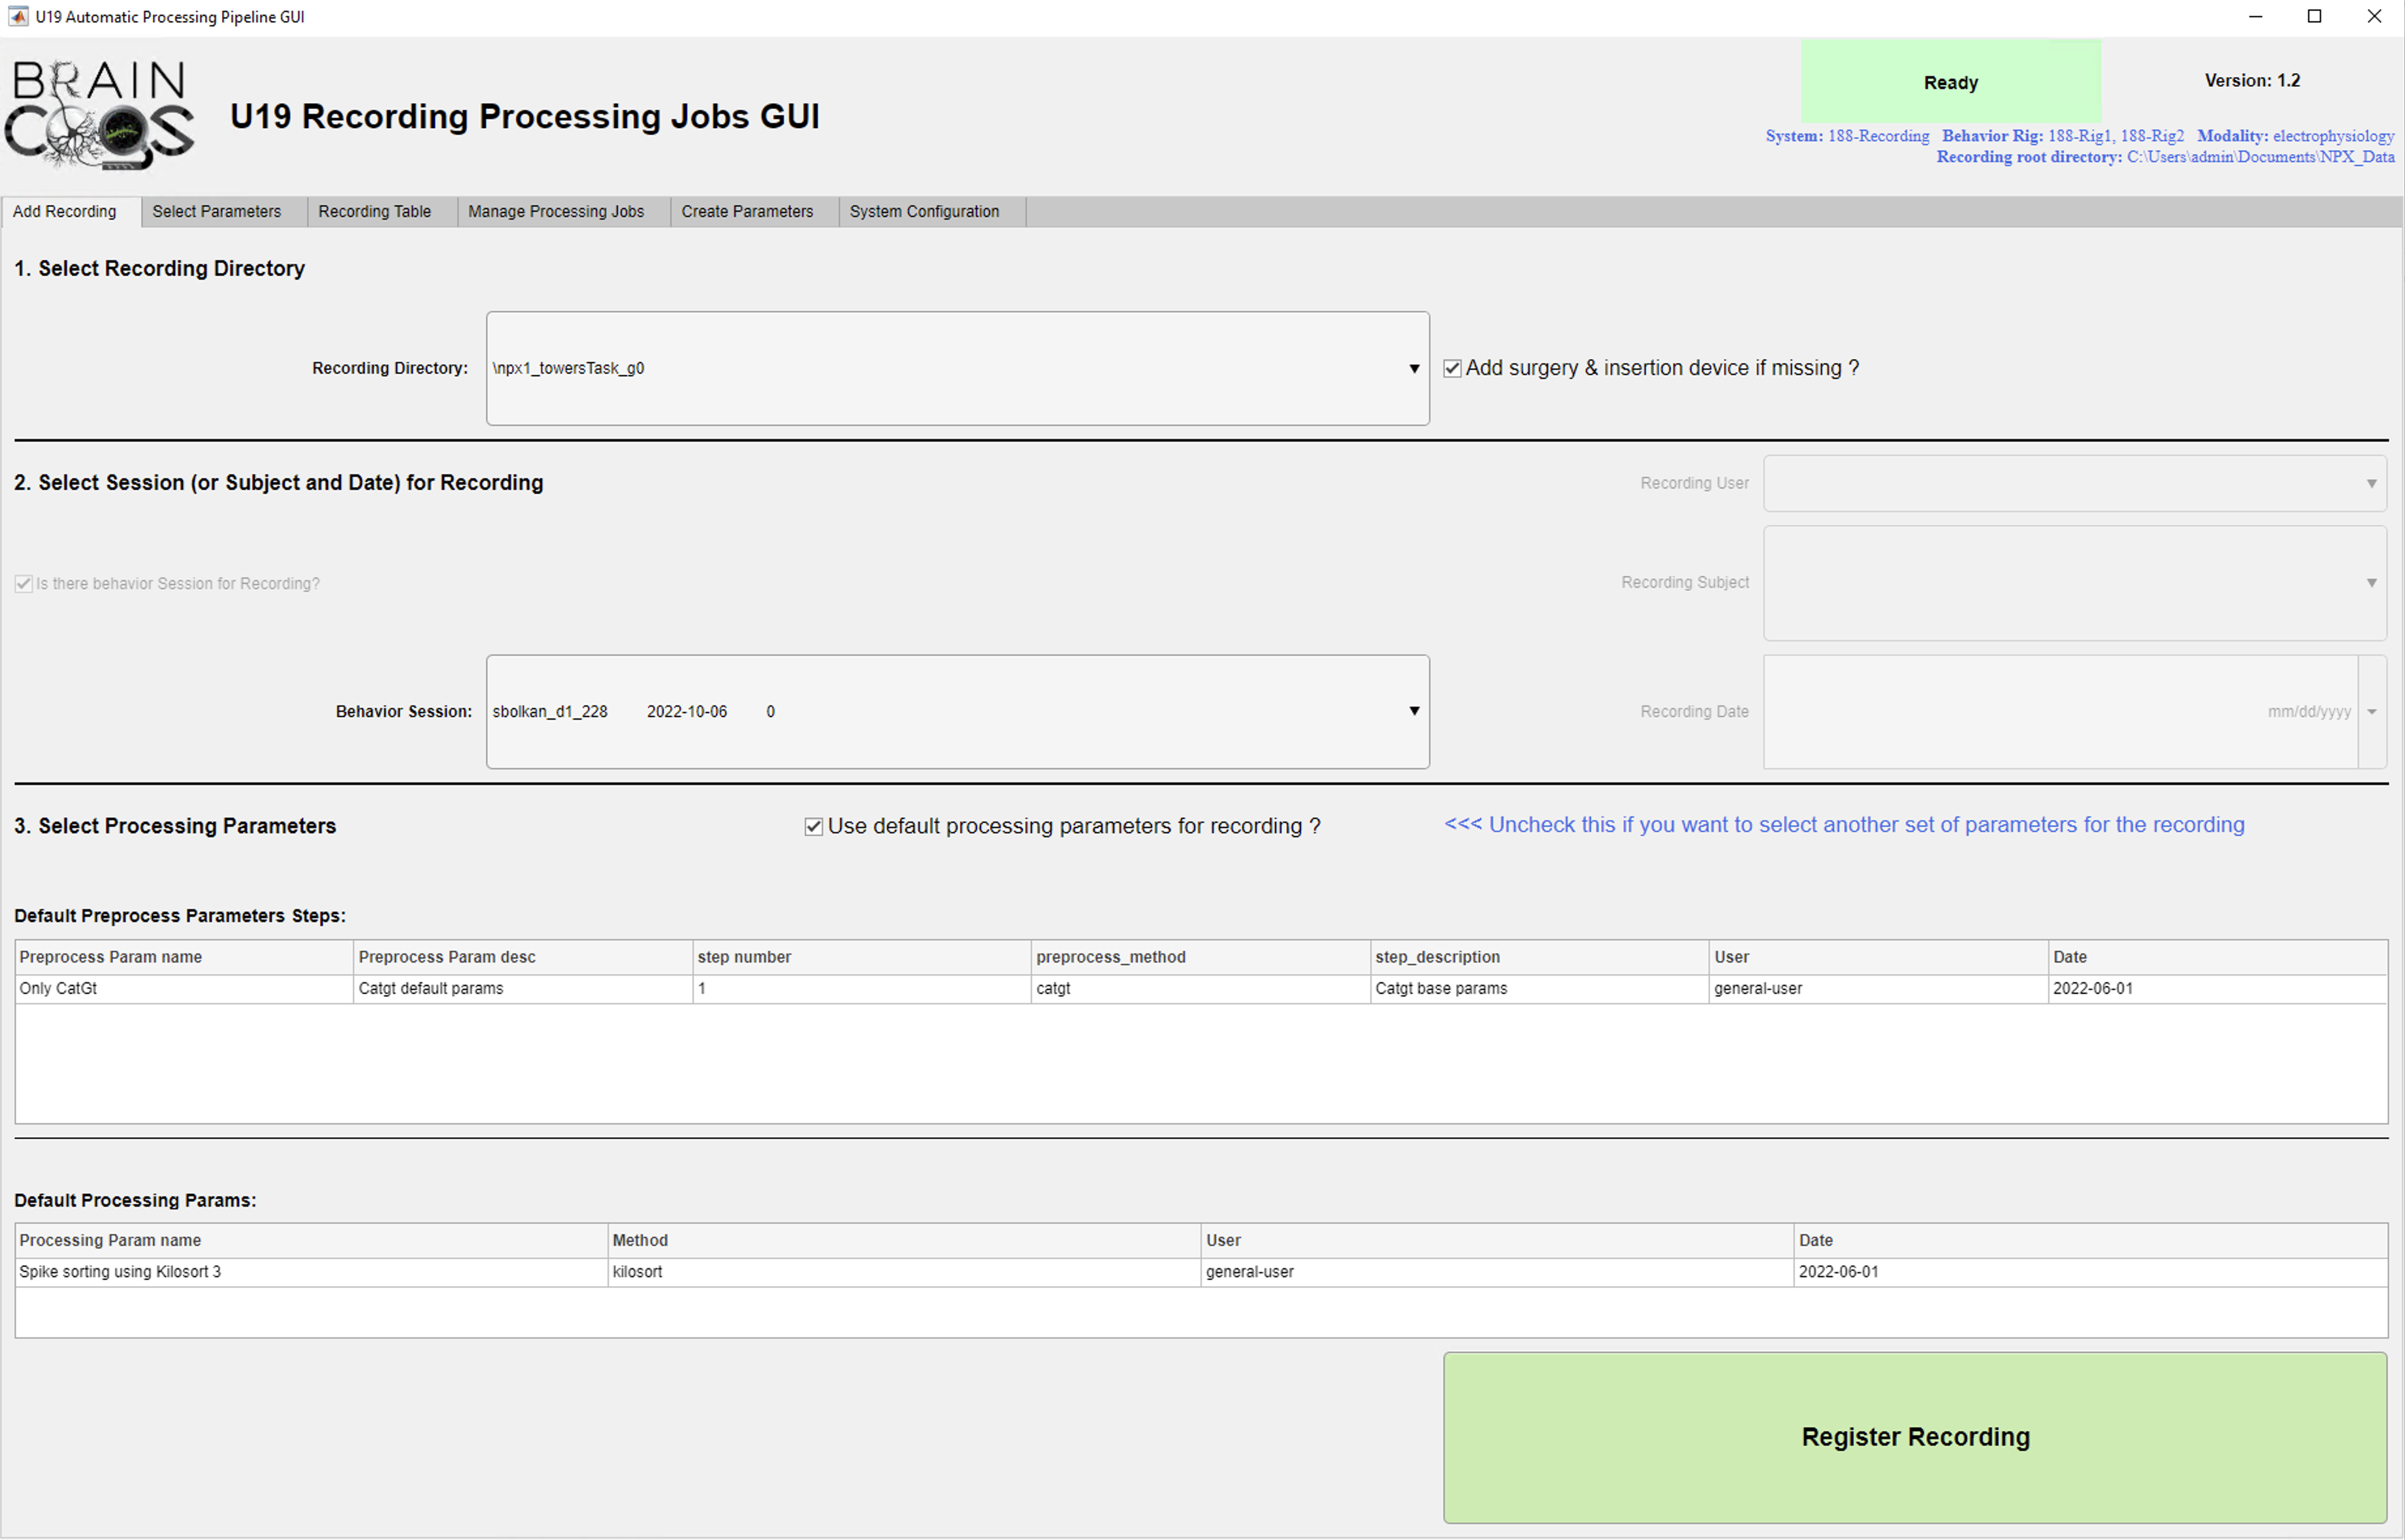
- Select the recording directory from the dropdown list in section 1.
- If no behavior is associated with this recording, uncheck the Is there behavior Session for Recording checkbox.
- Check the "Add surgery & insertion device if missing" checkbox if you want to add electrode/microscope/optic fiber insertion coordinates.
- Select the behavior session corresponding to the recording from the dropdown list in section 2.
- Click the Register Recording button.
If no surgery data is found for the subject, a small form for entering surgery and device insertion coordinates appears.
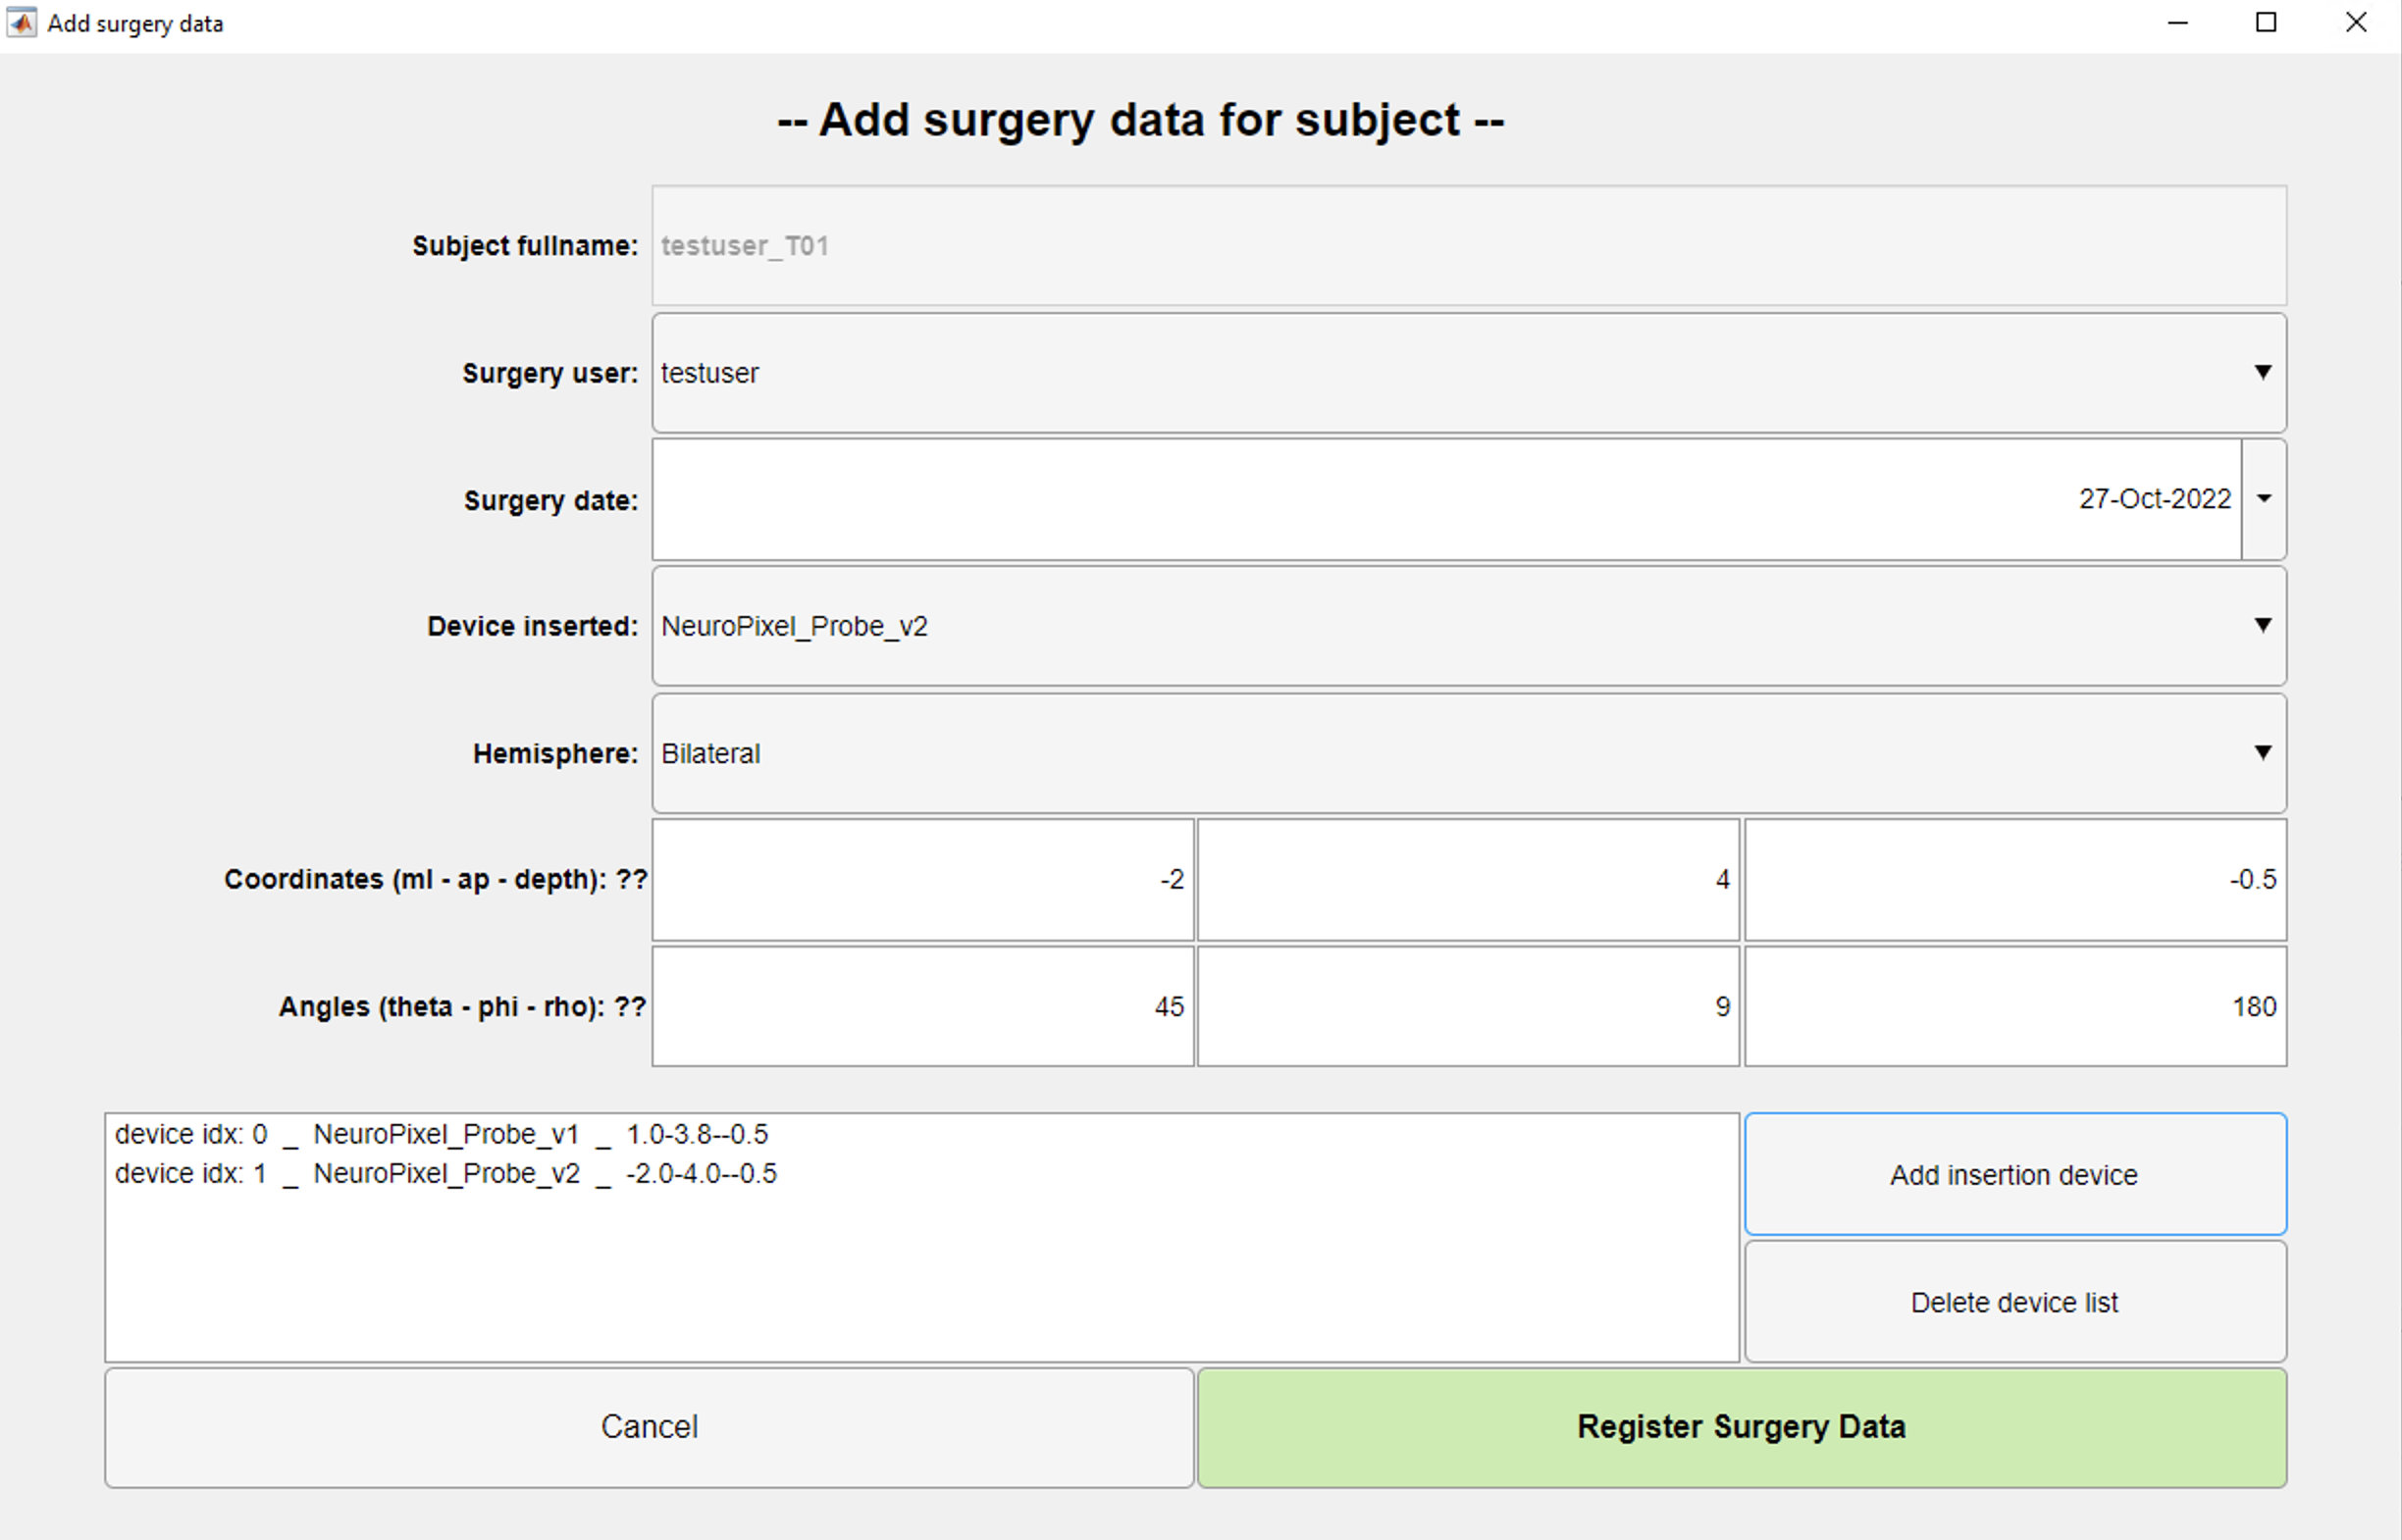
Add surgery data form Common coordinates for previous recordings:
| Area | ml(mm) | ap(mm) | depth(mm) | theta(°) | phi(°) | rho(°) |
|---|---|---|---|---|---|---|
| mPFC L HEMIS | -0.6 | 1.8 | 3.8 | -45 | -9 | 180 |
| mPFC R HEMIS | 0.6 | 1.8 | 3.8 | 45 | 9 | 0 |
| HPC L HEMIS | -1.5 | 2 | 1.8 | -45 | -9 | 180 |
| HPC R HEMIS | 1.5 | 2 | 1.8 | 45 | 9 | 0 |
Wait until the recording has been copied to PNI storage resources (cup).
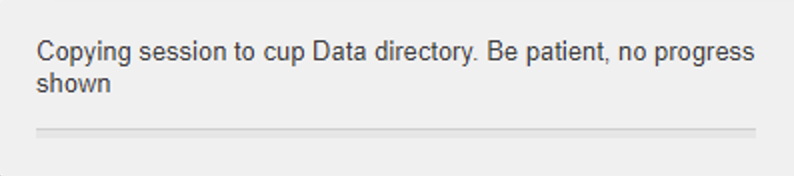
Dialog shown while copying session
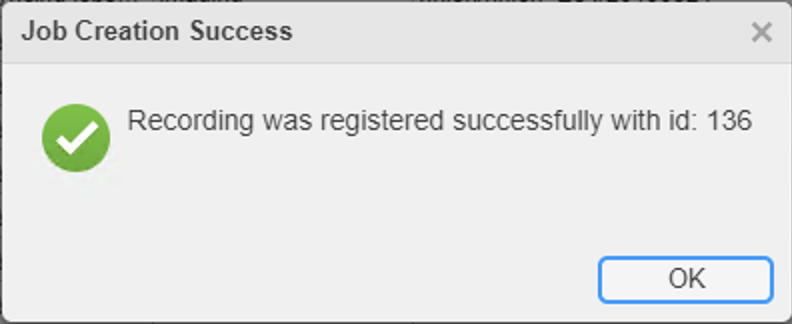
- After the recording has been transferred, a small dialog showing the recording ID appears.
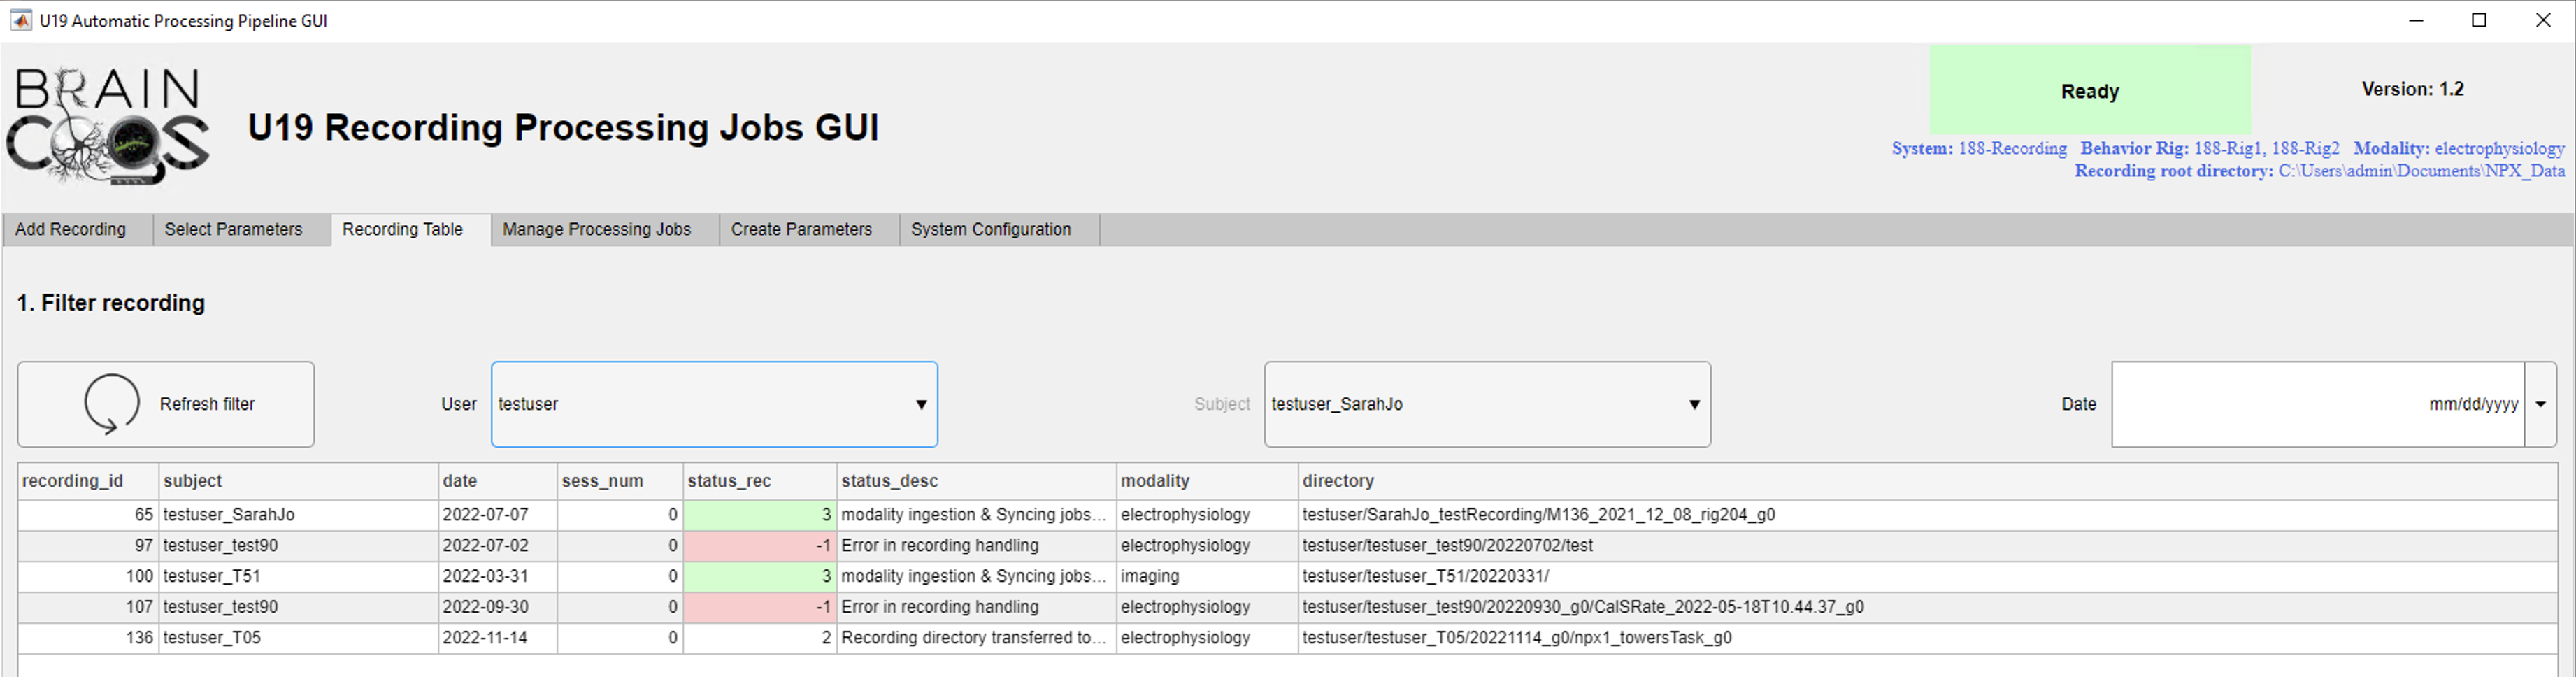
- You can check basic info about the new recording in the "Recording Table" tab. This tab becomes active after the recording is transferred.
Notes
- This use case assumes the recording will be processed with default parameters.
"Advanced" (select parameters) use case
- Follow steps 1-4 from the Default use case.
- Uncheck the "Use default processing parameters for recording?" checkbox.
- Click the "Select parameters >>>" button.
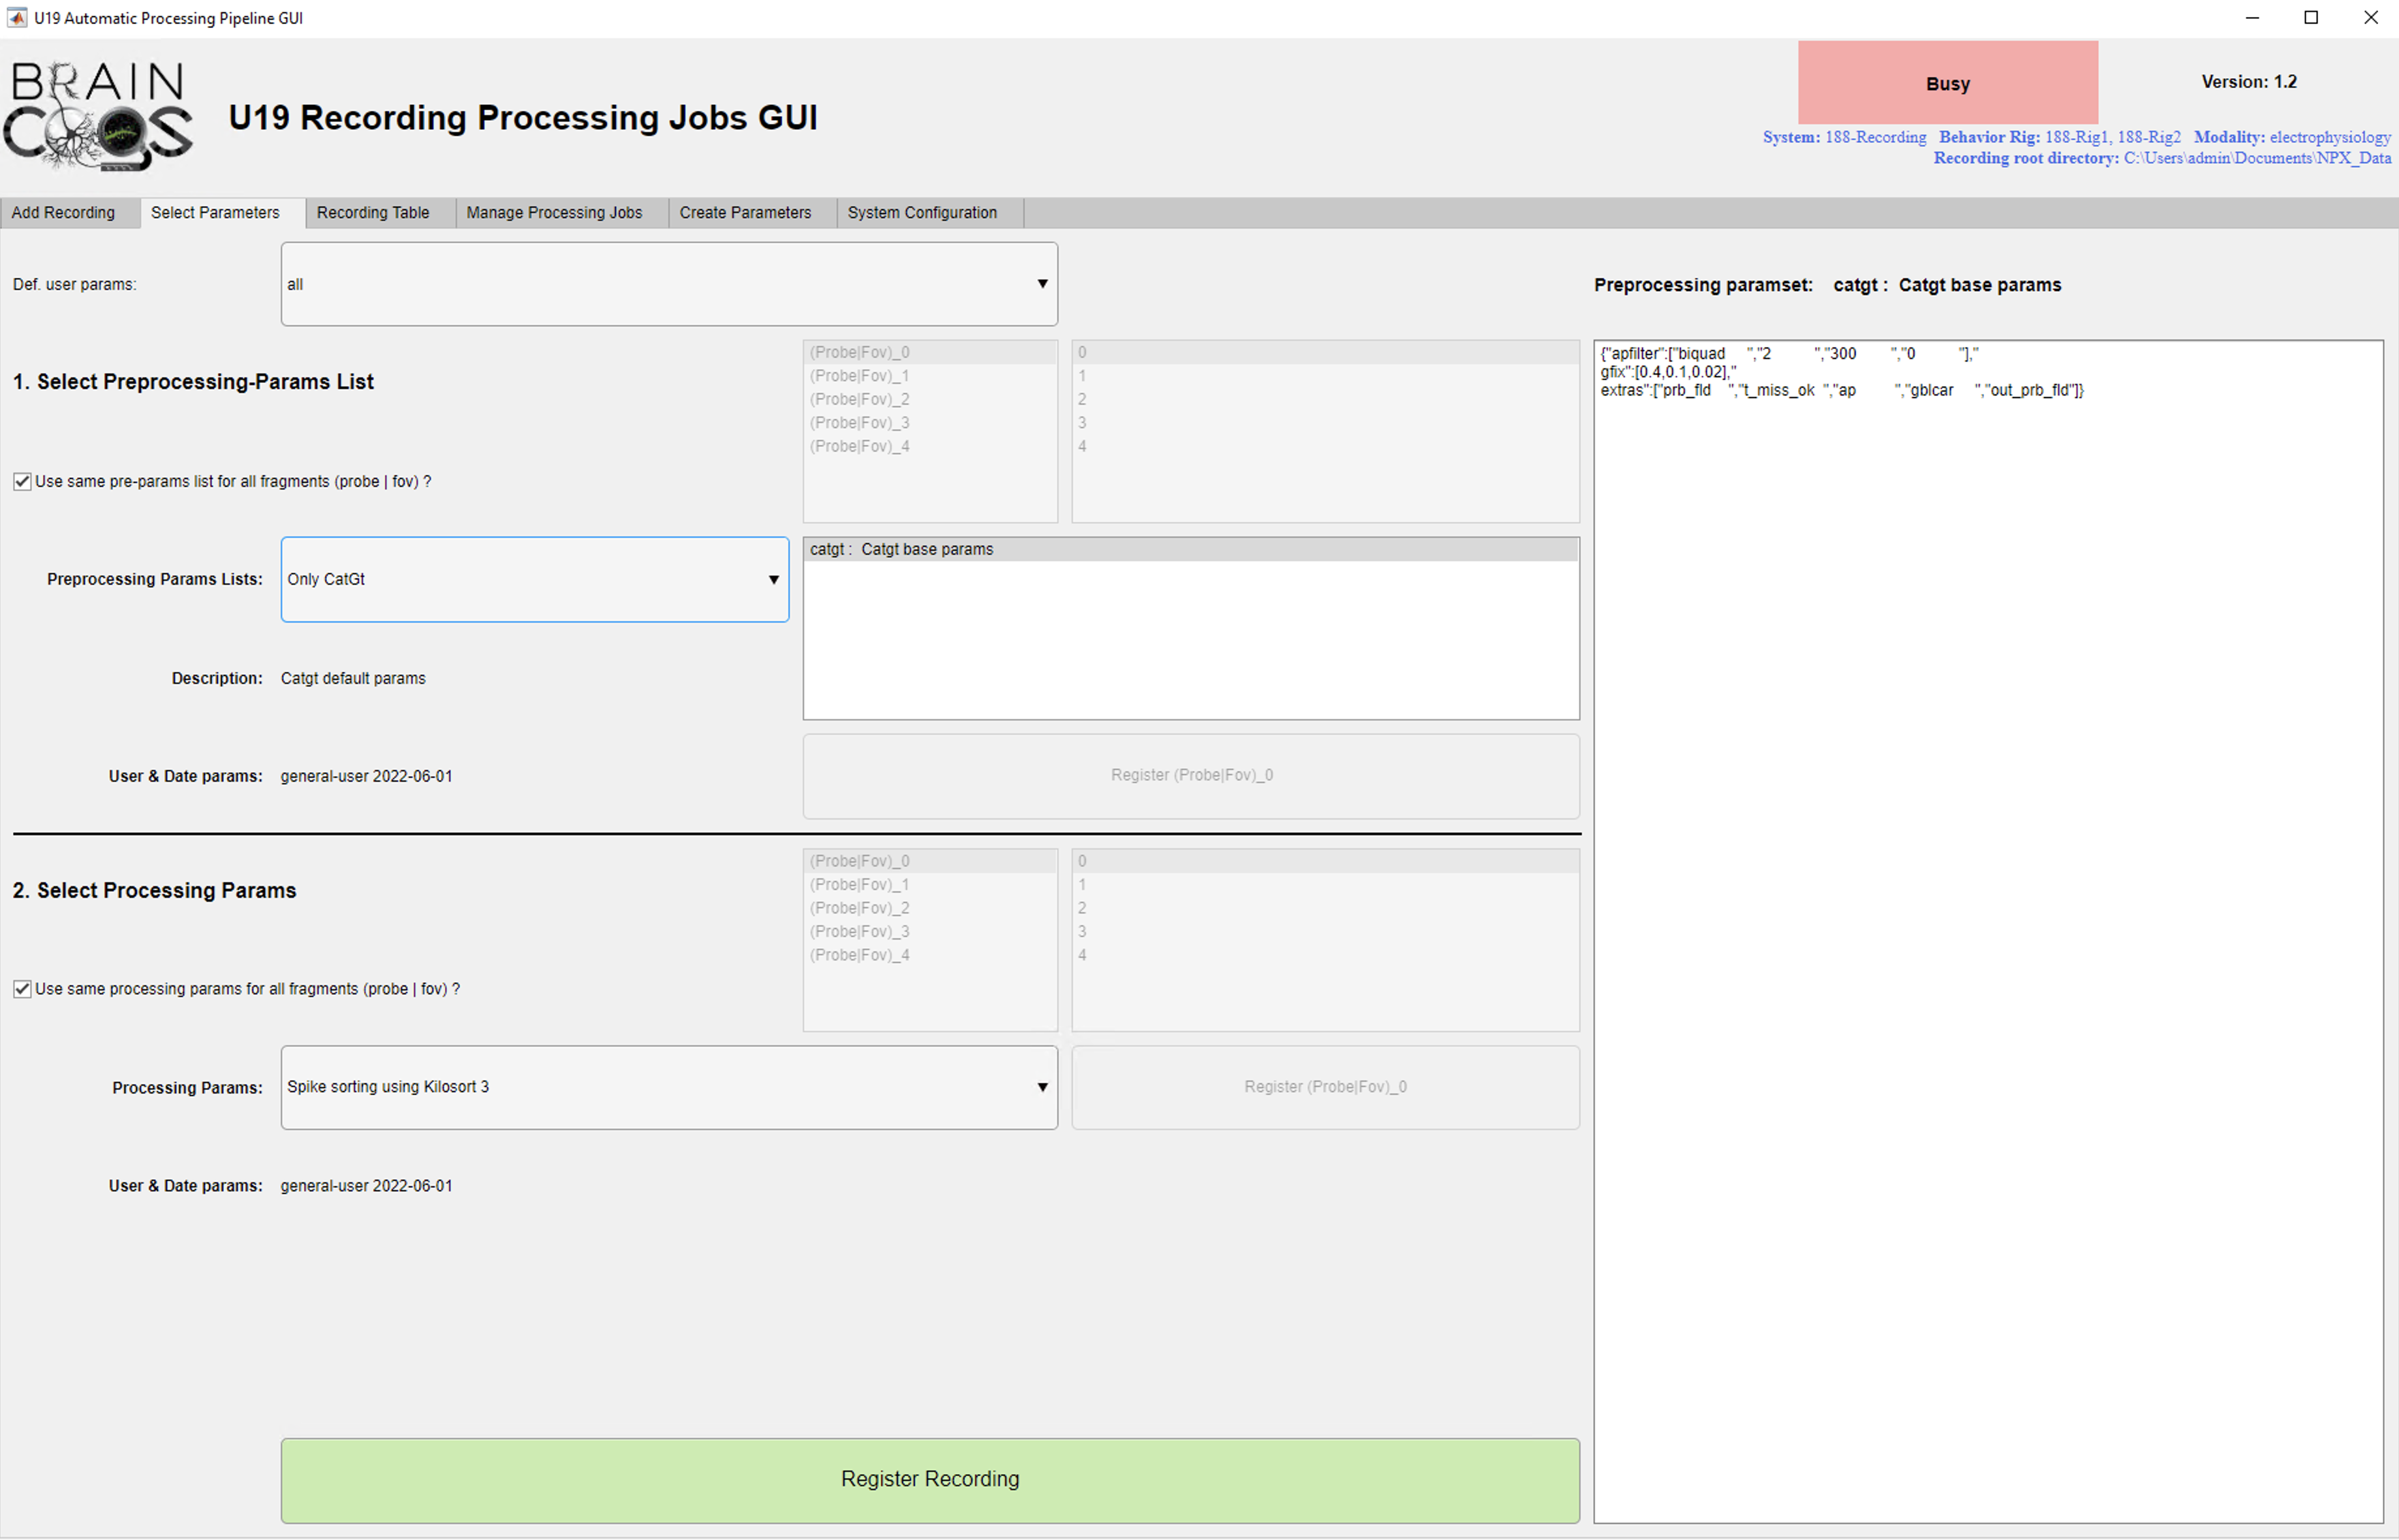
- On the "Select parameters" tab (assuming all probes/FOVs will be processed with the same parameters):
On section 1:
- In the Preprocessing Params Lists dropdown, select a preprocessing param list.
- You can see which preprocessing steps are defined for that list in the listbox on the right.
- Selecting a preprocessing step in the listbox shows its specific parameters in the text area on the right.
On section 2:
- In the Processing Params dropdown, select a processing parameter set suited to the recording.
- Selecting a processing parameter set from the dropdown shows its specific parameters in the text area on the right.
- Click the Register Recording button.
The next steps are identical to the "Default use" case.
Monitor jobs
After a recording is submitted for processing, you can track, reprocess, and visualize all jobs corresponding to that recording.
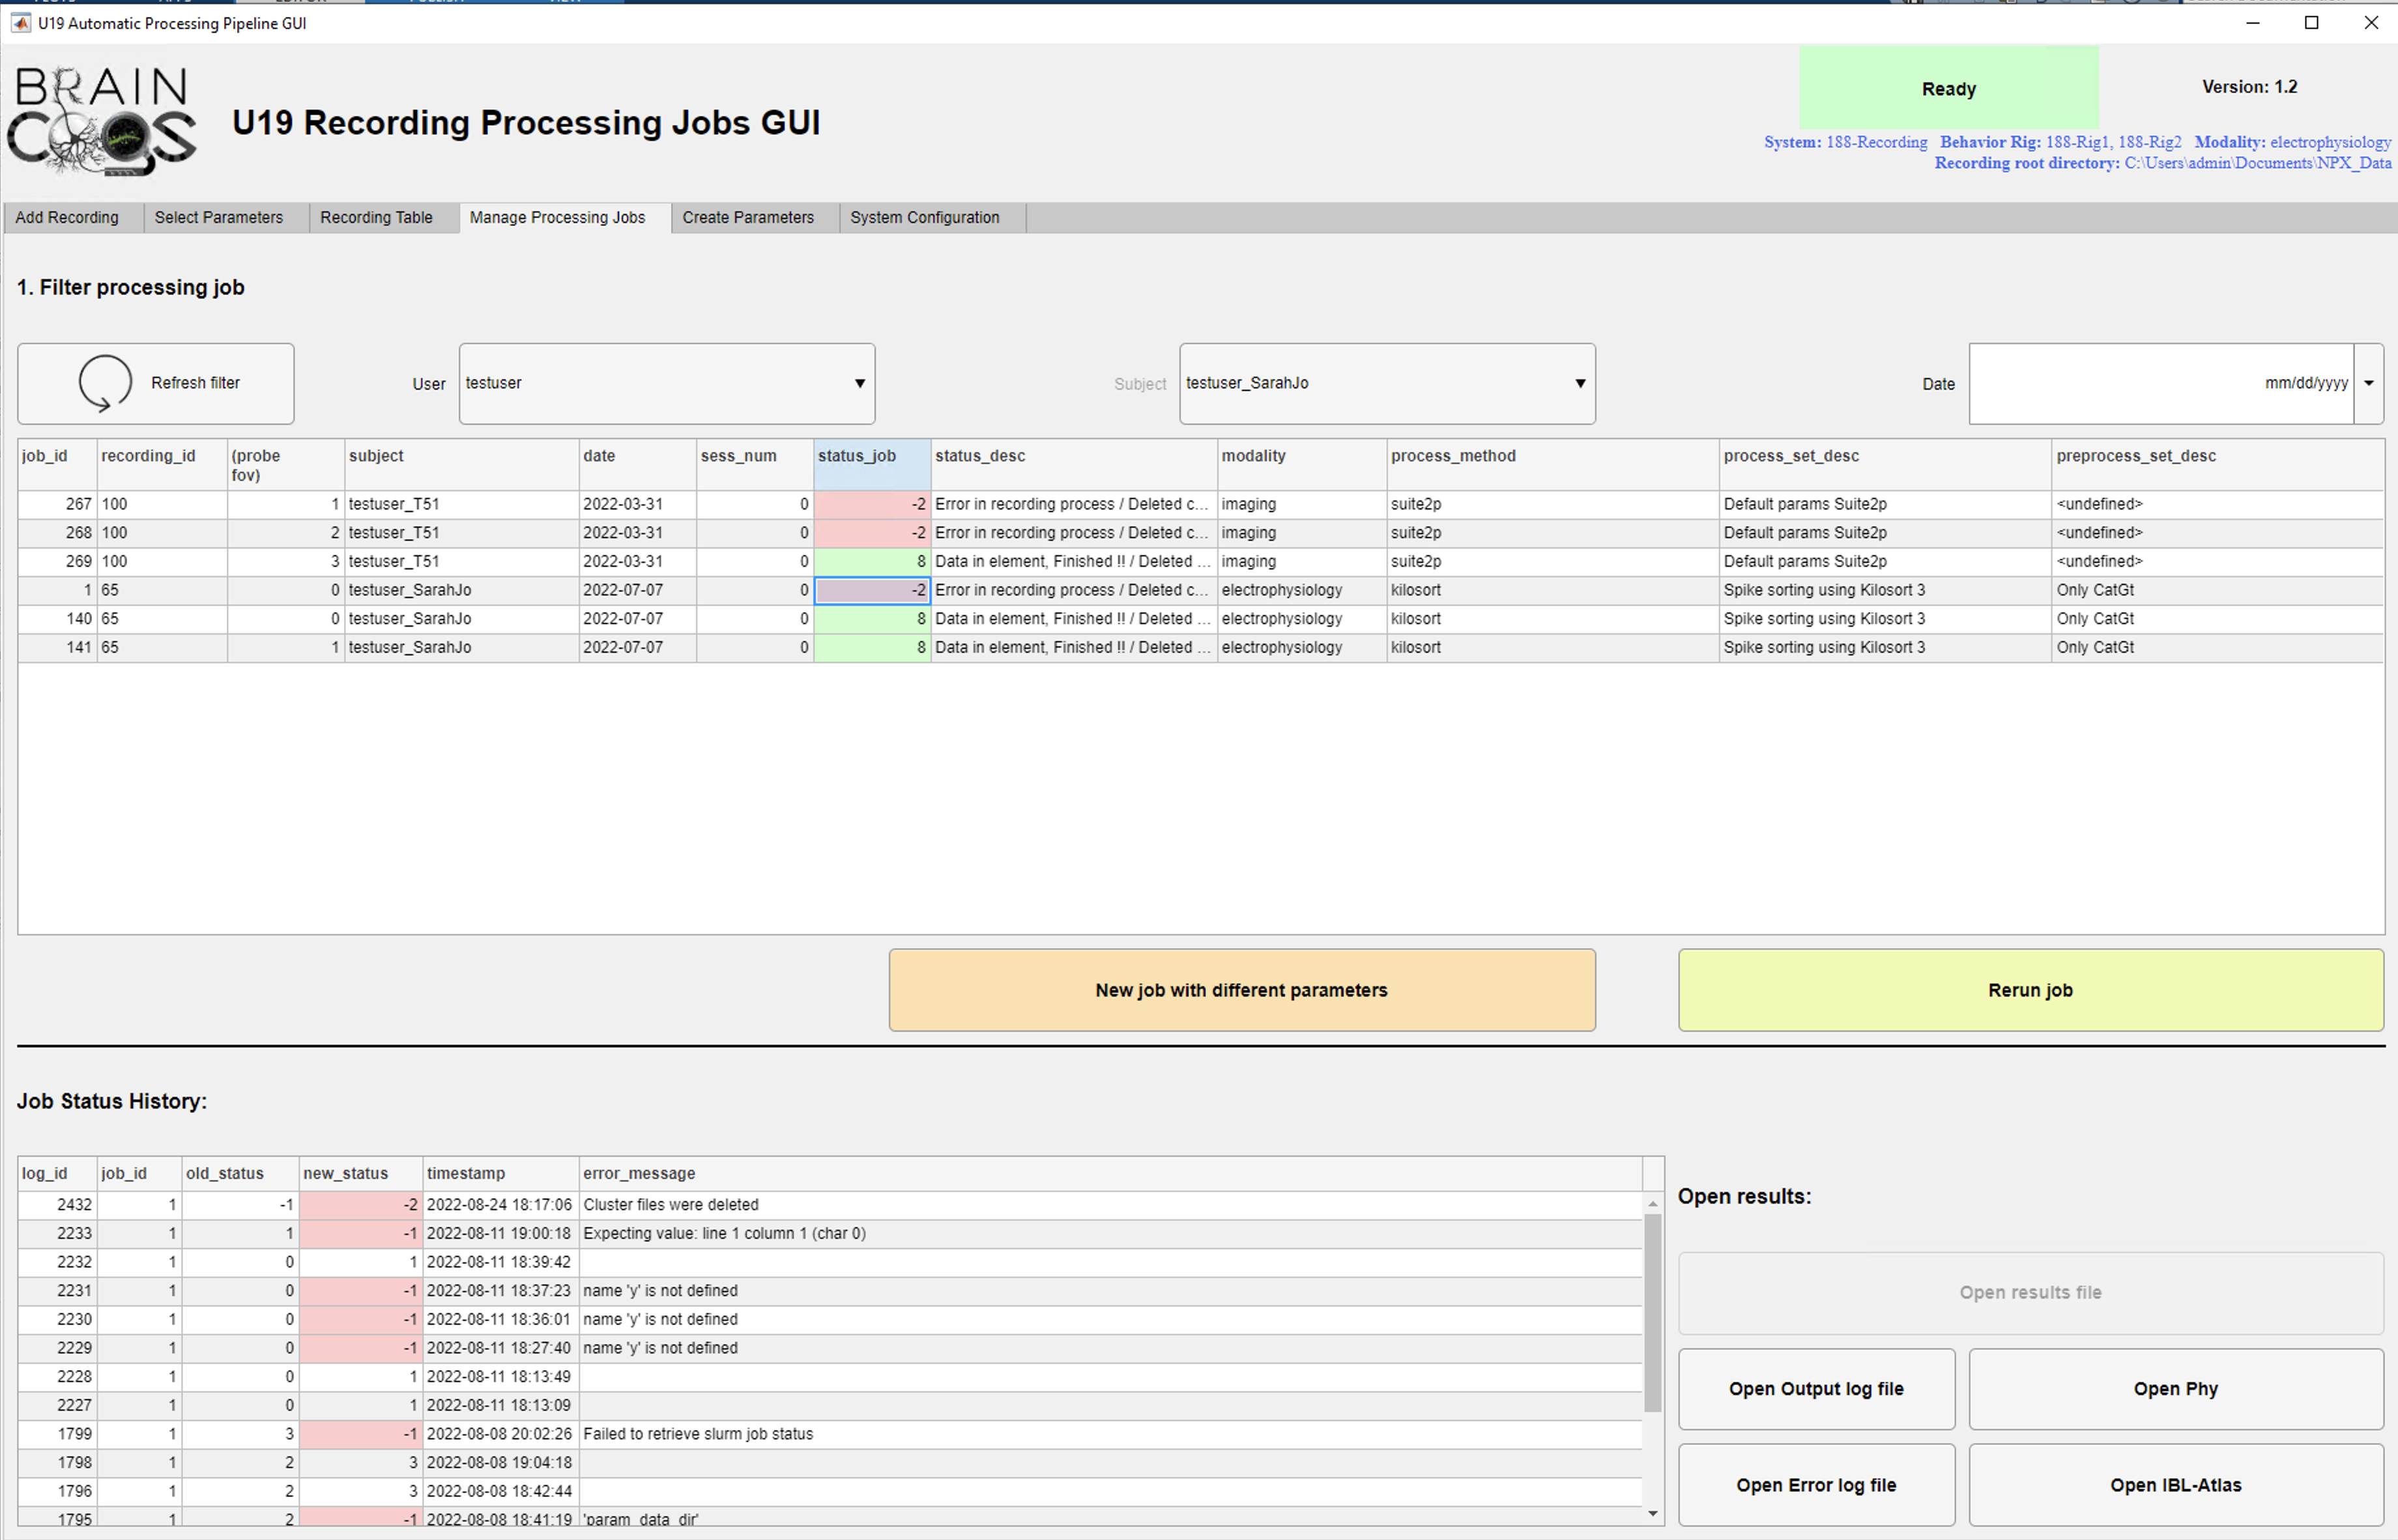
Manage Processing Jobs main screen
Track status
- Switch to the "Manage Processing Jobs" tab.
- Use the "User", "Subject", and "Date" dropdowns/fields to find the desired jobs.
- Select the row corresponding to the desired job:
- The job status history is shown for the selected job.
If the job is in an error status (-1, -2; "Error in recording process"):
- Open the error log file in the bottom-right corner by clicking the "Open Error Log File" button.
- If you believe the cause of the error is now resolved, rerun the job by clicking the "Rerun job" button.
If the job is in a finished status (7, 8; "Data in element DB"):
Open the output log file in the bottom-right corner by clicking the "Open Output Log File" button.
Visualize processing results by clicking the bottom-right buttons: Open Phy and Open IBL Atlas for ephys, Open Suite2p-GUI for imaging.
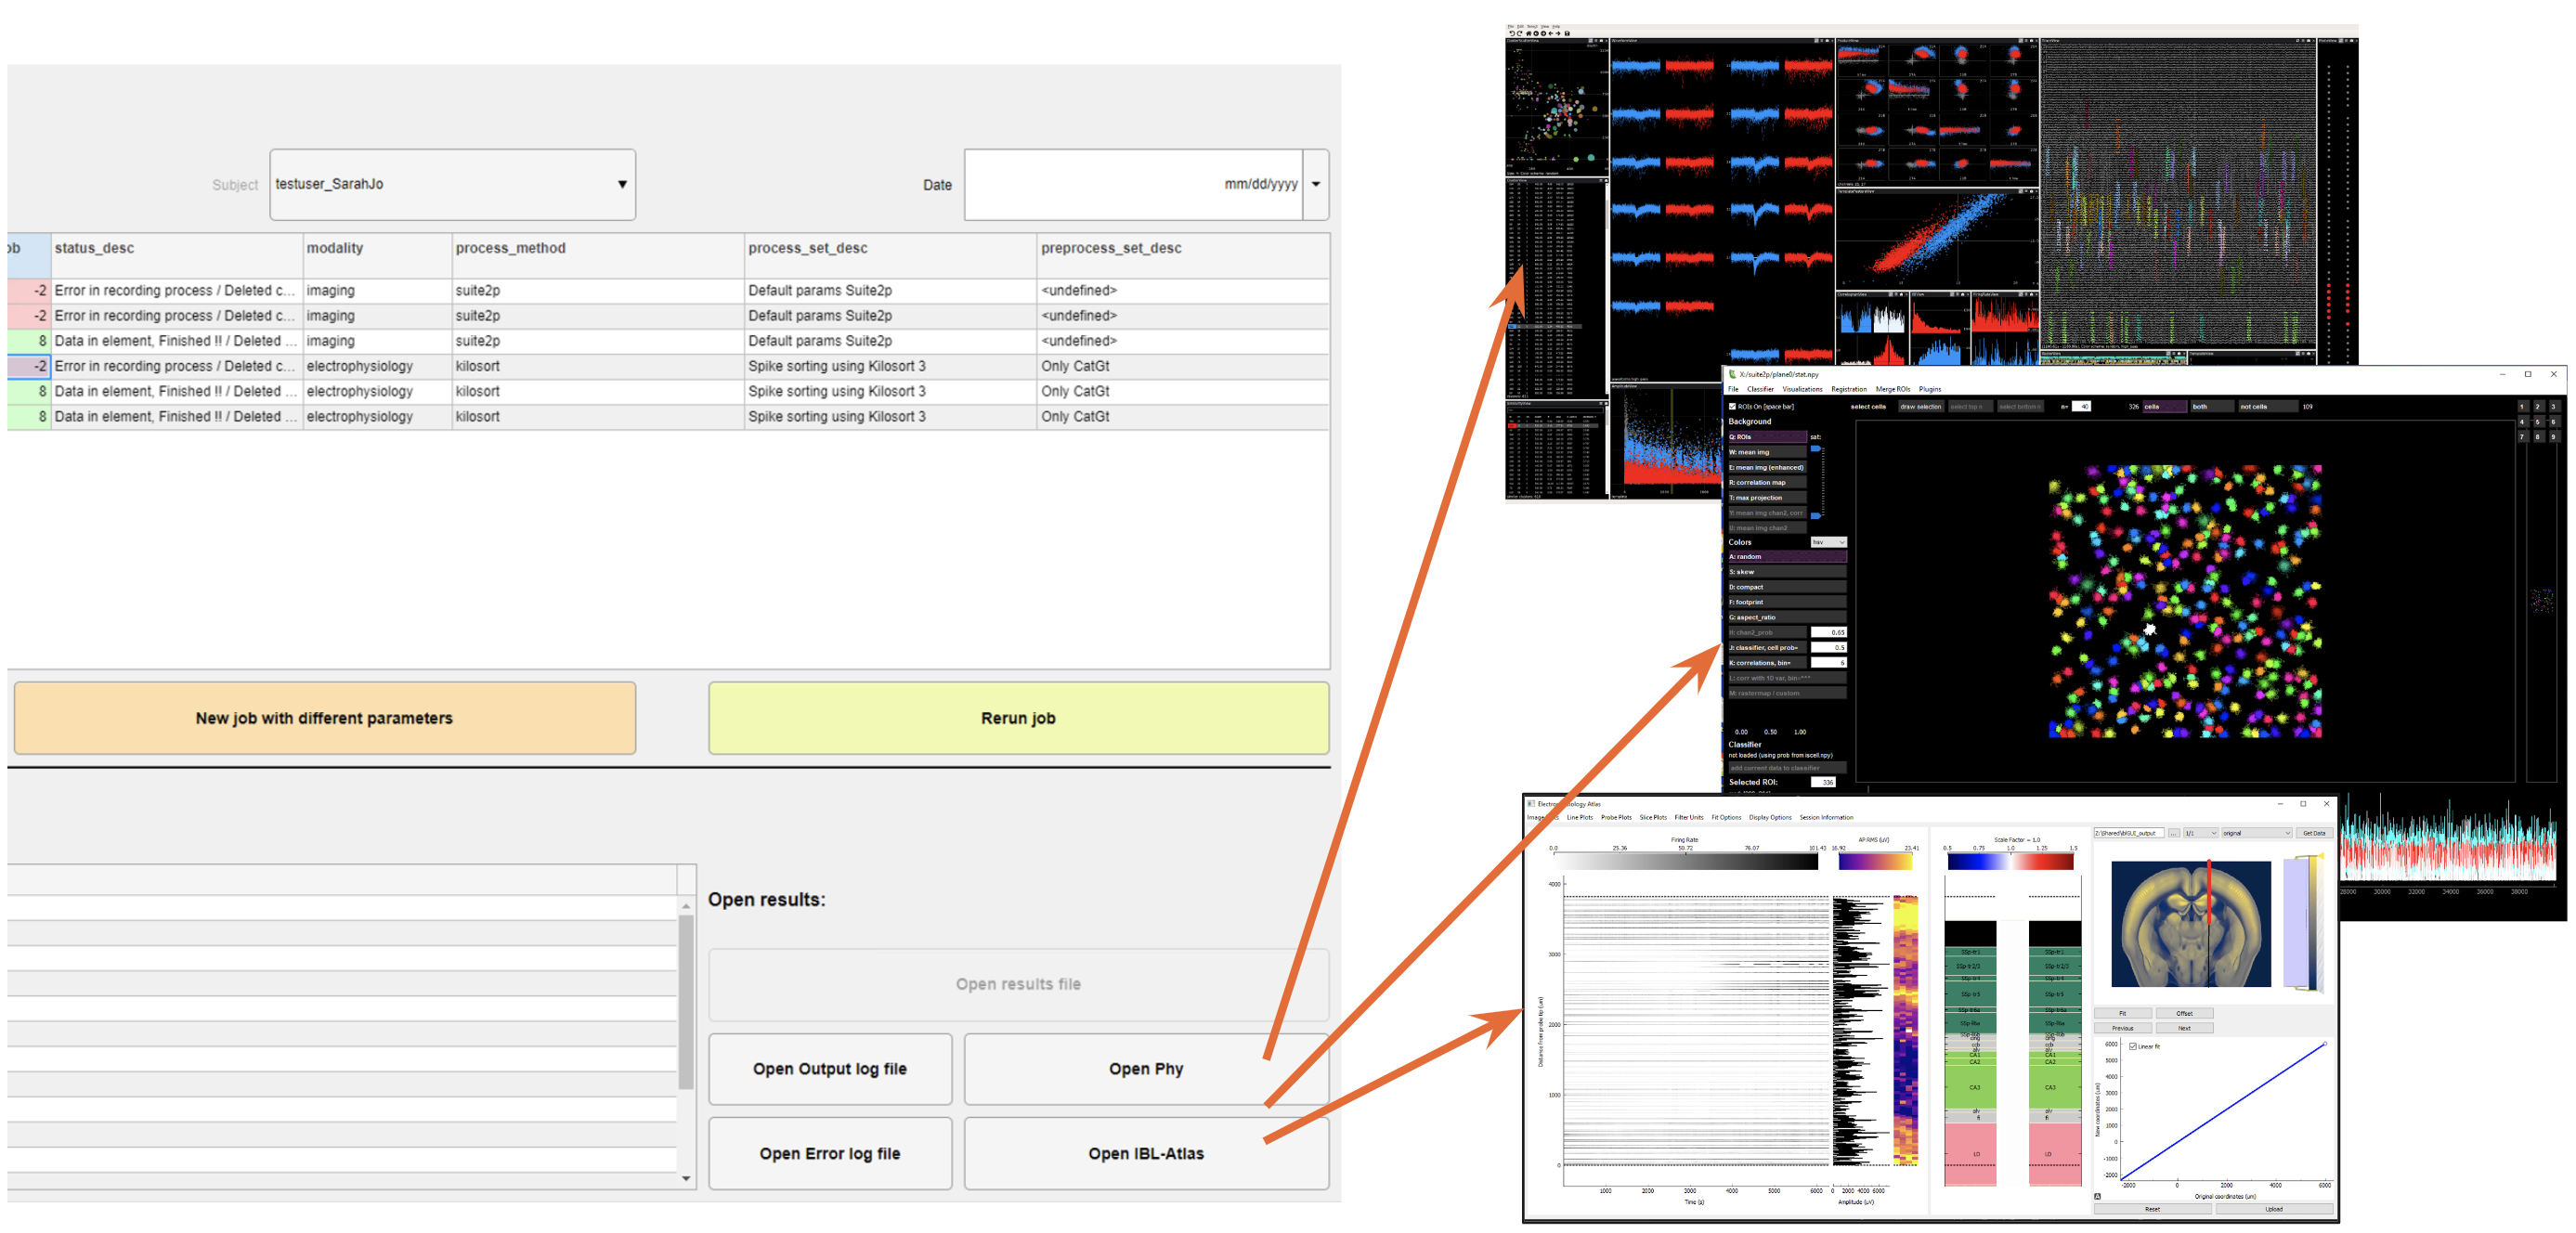
Visualization tools available
Rerun jobs
- You can rerun a job with different parameters by clicking the New Job With different Parameters button.
- Follow the "Advanced" (select parameters) use case .
Create new sets of processing parameters for recordings
To process recordings with non-default parameters, you need at least one of the following:
- A new set of processing parameters (parameters for the algorithm that processes the data, e.g. Kilosort, Suite2p).
- A list of preprocessing steps, each with its own set of preprocessing parameters (e.g. run CatGT + TPrime before Kilosort).
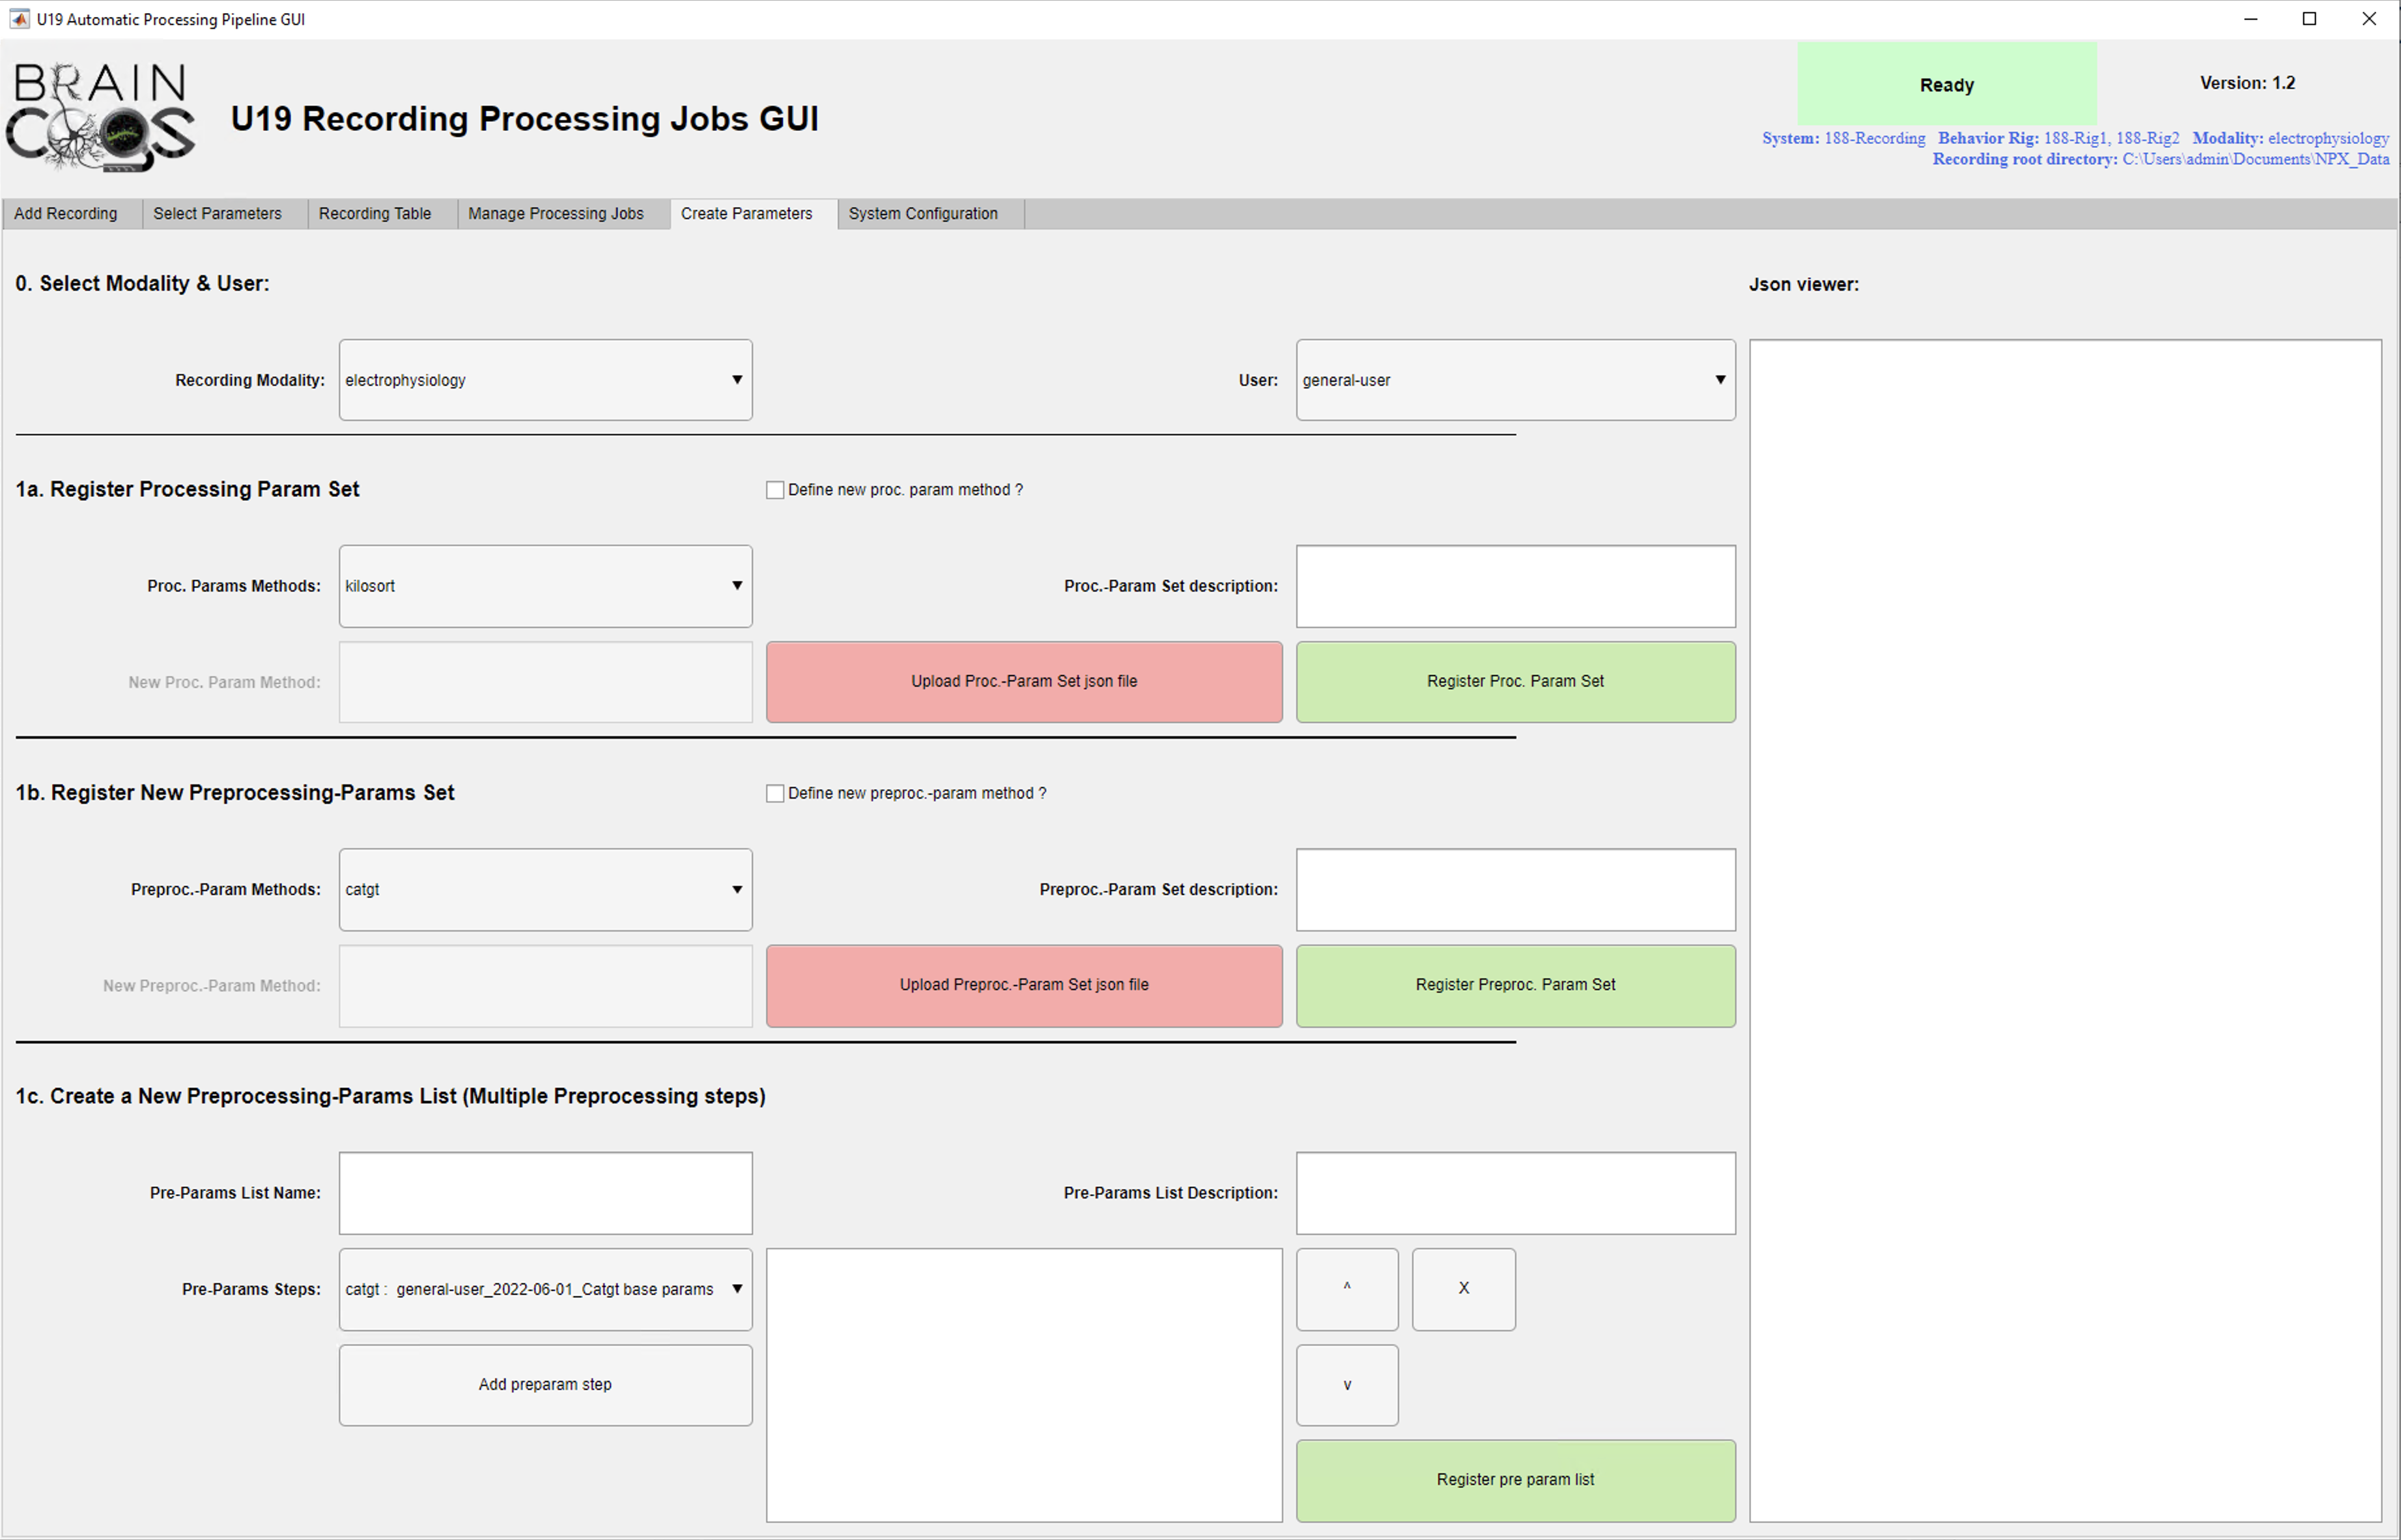
Create new Processing parameters (algorithm params)
- Note: You need a JSON file with all parameters ready before starting this process.
- Here is an example Kilosort parameter JSON file that you can use as a template for your own.
- Switch to the "Create Parameters" tab.
On section 0:
- In the "recording modality" dropdown, select which modality the parameters correspond to.
- In the "user" dropdown, select your NETID username (select general-user if this parameter will be shared by many users).
On section 1a:
- In the "proc. Param Method" dropdown, select which method (algorithm) these parameters refer to.
If the algorithm is not found on "proc. Param Method" dropdown:
- Check the "define new proc. param method ?" checkbox.
- Write the new processing method name in the "New Proc. Param. method" field.
- Check the automation pipeline developer guide to add the corresponding processing code.
- In the "proc. Param Set Description" field, write a short description for the new parameters.
- Click the "Upload Proc-Parm Set json file" button and browse for/load your JSON file with parameters. You can review your parameters in the text area on the right.
- Click the "Register Proc. Param Set" button.
Create new preprocessing parameters (a single step on preprocessing list)
- Note: You need a JSON file with all parameters ready before starting this process.
- Here is an example CatGT parameter JSON file that you can use as a template for your own.
- Switch to the "Create Parameters" tab.
On section 0:
- In the "recording modality" dropdown, select which modality the parameters correspond to.
- In the "user" dropdown, select your NETID username (select general-user if this parameter will be shared by many users).
On section 1b:
- In the "Preproc.-Param Method" dropdown, select which method (tool) these parameters refer to.
If the tool is not found on "Preproc.-Param Method" dropdown:
- Check the "define new prerproc.-param method ?" checkbox.
- Write the new preprocessing method name in the "New Preproc.-Param method" field.
- Check the automation pipeline developer guide to add the corresponding processing code.
- In the "Preproc.-Param Set Description" field, write a short description for the new parameters.
- Click the "Upload Preproc.-Parm Set json file" button and browse for/load your JSON file with parameters. You can review your parameters in the text area on the right.
- Click the "Register PreProc. Param Set" button.
Create new preprocessing parameters list (a set of preprocessing parameters)
- Note: If you just created a preprocessing parameter, restart the GUI.
- Switch to the "Create Parameters" tab.
On section 0:
- In the "recording modality" dropdown, select which modality the parameters correspond to.
- In the "user" dropdown, select your NETID username (select general-user if this parameter will be shared by many users).
On section 1c:
- In the "Pre-Params List Name" field, enter a suitable name for the list.
- In the "Pre.-Param List Description" field, write a short description for the new list.
- From the "Pre.-Params steps" dropdown, select the desired preprocessing step to add to the list.
- Click the "Add Preparam Steps" button.
- Repeat steps 6 and 7 to add all desired preprocessing steps to the list.
- Use the "v" and "^" buttons to set the order of the preprocessing steps.
- Use the "x" button to delete an unwanted preprocessing step.
- Click the "Register pre param list" button.